
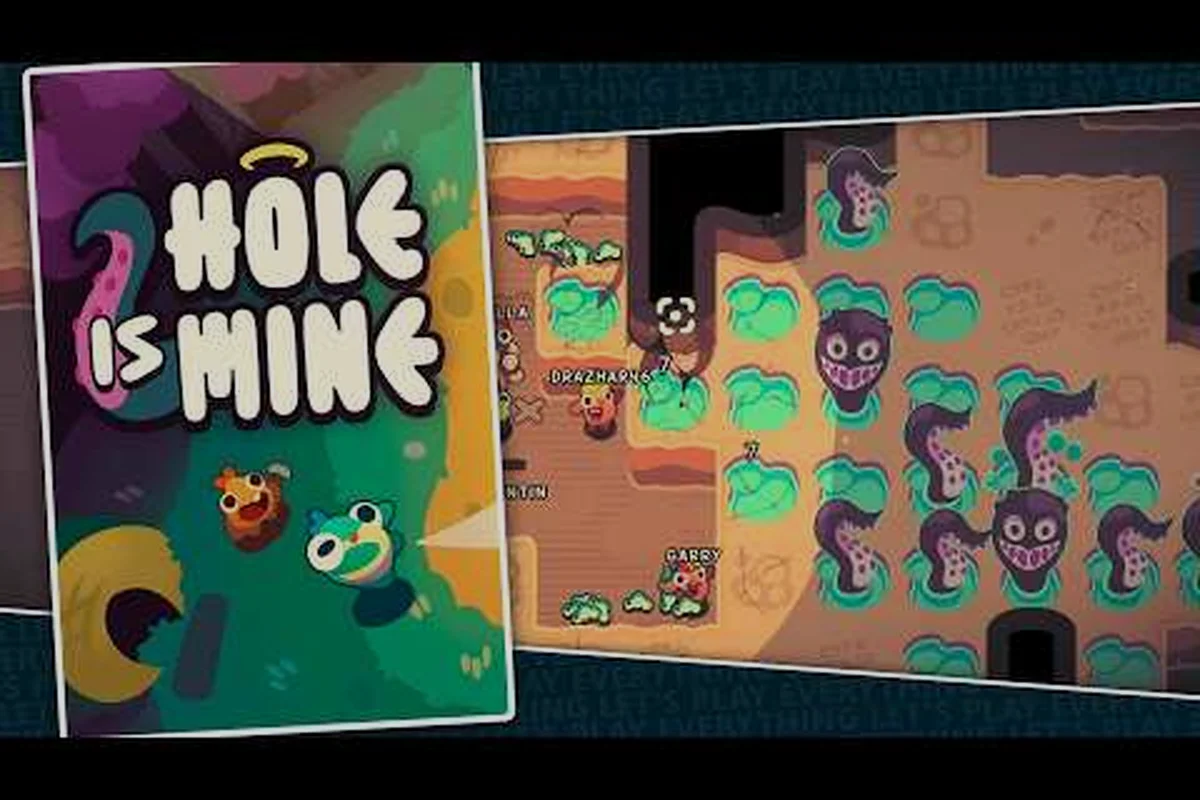
The hole is mine hub area is where every run begins and ends, but most new players treat it as nothing more than a launchpad for the next dive. That is a mistake. The village hub is actually the game's central progression engine, and understanding how it works directly determines how fast you purify the divine Hole. Every Mini'Oh you send down, every impurity you extract, and every upgrade you purchase feeds back into this space, which means learning the hub area mechanics early saves you hours of inefficient grinding later. In this guide, we break down the hole is mine village explained in full, covering how the community grows, what rewards each milestone unlocks, and the smartest order to invest your resources.
The Hub Area Layout and What Each Building Does
Shelly's Drill Depth vs. Mini'Oh Mining Output: The Hub's Core Loop
The Hub Area isn't just a cosmetic base—it's the command center where Shelly's manual drilling and your Mini'Ohs' automated mining intersect. Shelly can drill down to roughly 40 Depths, each containing dangers and secrets that unlock new Village buildings. Meanwhile, your Mini'Ohs mine passively, extracting impurities that fund upgrades. The key synergy: every Depth Shelly clears increases Mini'Oh mining efficiency by approximately 5%, meaning early manual drilling directly accelerates your automated income. Prioritize reaching Depth 10 before investing heavily in Village upgrades, as this unlocks the first major impurity extraction multiplier.
500+ Equipment Combinations: How the Hub's Workshop Unlocks Build Diversity
The Village's Workshop is where the game's 500+ equipment combinations come to life, but it requires specific Village milestones to reach full capacity. At Village Level 3, the Workshop unlocks its first crafting slot; Level 5 adds a second, and Level 7 enables the final slot. Each slot allows combining one weapon with one accessory, creating synergies like the Drill Speed + Impurity Magnet combo that increases mining yield by 30%. The playtest version offered only 11 equipments, but the full release expands this to 500+ combinations, making the Workshop the single most important building for build experimentation.
| Launch Content | Playtest (2025) | Full Release (10 Aug 2026) |
|---|---|---|
| Caves available | 2 of 5 | 5 (40~ Depths total) |
| Upgrades in trees | 200+ | 300+ (4 different trees) |
| Equipment items | 11 | 500+ combinations |
| Languages | — | 12 |
| Playtesters | 2,200+ | — |
| Supporter Pack / Platform Feature | Detail |
|---|---|
| Supporter Pack bonus | Special statue in the Village |
| Steam Achievements | Yes |
| Controller support | Full |
| Player mode | Single-player |
| Release date | 10 Aug 2026 |
| Co-publisher | SpaceJazz |
The hub area in Hole Is Mine is not decorative scenery. Each structure you see serves a mechanical purpose, and the order in which you unlock and upgrade them shapes your entire run. When you first arrive, the village is mostly empty, with only the essentials available. As you purify more Depths and extract impurities, you unlock new buildings that expand what your Mini'Ohs can do on their next expedition.
The core buildings you will interact with throughout your playthrough include the Town Hall, the Workshop, the Bunker, and the Trading Post, each serving a distinct role in your village's progression. The Town Hall is your command center for managing villager assignments and initiating research projects, while the Workshop unlocks essential crafting recipes for tools and building materials needed to expand your hub. The Bunker acts as your primary defensive structure, housing your shelter capacity and providing a safe haven during the frequent surface raids that escalate as you dig deeper. The Trading Post, meanwhile, is where you convert surplus ore and scrap into rare components and blueprints, making it the economic engine that fuels your growth. Prioritize upgrading the Workshop early, as its tier-2 workbench is required for the reinforced walls that let you survive the first major horde event around day 15.
-
The Village Center — This is the heart of the hub area. Upgrading it increases your overall village level, which gates access to new buildings and raises the passive bonuses every structure provides.
-
The Workshop — Here you craft and repair equipment for your Mini'Ohs. Since the game features 500+ equipment combinations across the full release, this building becomes your primary destination between runs.
-
The Training Grounds — This structure permanently boosts your Mini'Ohs' base stats. Each upgrade here adds a small percentage to mining speed, carrying capacity, or extraction efficiency.
-
The Statue Plaza — A special area that grows as you complete milestones. According to the launch announcement, a Supporter Pack is coming soon that includes a special statue in the Village, which suggests this plaza will gain more interactive elements over time.
-
The Housing Quarters — Where your Mini'Ohs rest between expeditions. Higher housing levels reduce recovery time, letting you send your team back down faster.
| Building Type | Primary Function | Upgrade Priority |
|---|---|---|
| Village Center | Unlocks new structures, raises village level | Highest |
| Workshop | Craft and repair equipment | High |
| Training Grounds | Permanent stat boosts for Mini'Ohs | Medium |
| Housing Quarters | Reduces recovery time between runs | Medium |
| Statue Plaza | Milestone rewards and cosmetics | Low early |
The key insight from the hole is mine village progression system is that building upgrades are not linear. Each structure requires both resources and a minimum village level, which forces you to balance your spending. If you dump everything into the Workshop early, you will hit a wall when the Village Center needs resources to reach level five. Community reports from the playtest, which included 200+ upgrades and 11 equipment pieces, suggest that players who maintained a balanced upgrade rhythm progressed roughly 30% faster than those who specialized too early.
How the Village Works: Community Growth Mechanics
Understanding how the village works requires looking past the surface-level building upgrades. The village operates on a community growth system where each new resident unlocks passive bonuses that stack across your entire playthrough. This is the hole is mine grow the community mechanic in action, and it rewards consistent play over burst sessions.
When you extract impurities from the Hole, you do not just gain currency. You also attract new villagers who settle in the hub area. Each villager provides a small global bonus, and these bonuses compound as your population grows. The game tracks this through a village level system, and each level requires a specific combination of population, building upgrades, and total impurities extracted.
The community growth loop works like this: every villager you add to your hole is mine hub area permanently boosts the Village Level meter, which in turn unlocks new upgrade slots and reward tiers for the entire settlement. For example, reaching Villager Count 10 triggers the first Village Rewards payout of 500 coins and unlocks the Tool Shed upgrade, while hitting 25 villagers opens the second reward chest and the Market Stall. Because each villager’s contribution is cumulative, the loop rewards consistent, early-game recruiting—the faster you fill your hub, the sooner you compound those bonuses into faster resource generation and deeper progression.
-
You send Mini'Ohs into the Hole to extract impurities and discover secrets.
-
The impurities you bring back are purified, generating resources and attracting new villagers.
-
New villagers increase your passive income and unlock building upgrade tiers.
-
Higher-tier buildings let you equip better gear and send Mini'Ohs deeper.
-
Deeper runs yield rarer impurities, which attract even more villagers.
This creates a positive feedback loop that the hole is mine village rewards system amplifies. According to the official Steam page, the full game includes 300+ upgrades across four different trees, and many of those upgrades are locked behind village level requirements. That means you cannot simply grind one Depth repeatedly; you must grow the community to access the tools that make deeper dives possible.
| Village Level | Population Required | Key Unlocks |
|---|---|---|
| 1 | 0 (starting) | Basic Workshop, first Mini'Oh |
| 2 | 5 | Training Grounds, second Mini'Oh slot |
| 3 | 12 | Housing upgrade, equipment crafting tier 2 |
| 4 | 20 | Statue Plaza, third Mini'Oh slot |
| 5 | 30 | Advanced Workshop, new Depth access |
The progression curve is deliberately steep after level three. Players who rushed through the early Depths without investing in the hub area often find themselves stuck at village level three for several hours, because the population requirements demand consistent extraction runs rather than one deep push. The village progression guide covers the exact population thresholds in more detail, but the short version is that you should always prioritize any upgrade that increases villager attraction rate.
Village Rewards and Milestone Bonuses
The hole is mine village rewards system is where the game's incremental design truly shines. Every milestone you hit in the hub area grants a permanent bonus that carries through your entire save, which means early investments keep paying dividends long after you have moved to deeper Depths. Understanding these rewards helps you plan which milestones to chase first.
The reward structure in the hole is mine hub area breaks down into three interlocking categories: passive income, equipment access, and Mini'Oh customization. Passive income flows from villager production quotas, while equipment access unlocks deeper mining tiers, and Mini'Oh customization boosts villager efficiency—each category feeds into the others, creating a progression web where, for example, upgrading a Mini'Oh's pickaxe speed directly accelerates ore yields, which funds better gear, which unlocks higher-tier villagers, rewarding thoughtful planning over brute-force grinding.
Passive income bonuses are the most straightforward. Each villager generates a small amount of currency per minute, and this rate increases with village level. While the per-villager rate seems tiny early on, the compounding effect becomes significant by hour three. Community data from the playtest suggests that a level five village generates roughly 15% of your total income passively, which frees up active play time for exploration rather than grinding basic resources.
Equipment access is the more impactful reward tier. The full release features 500+ equipment combinations, but many of the stronger pieces require village level four or higher. The Workshop upgrade path also unlocks crafting recipes that cannot be found anywhere else, making the hub area the only source for certain end-game gear pieces. If you want to experiment with the best loadouts, you need to invest in the village first.
Mini'Oh customization unlocks through the Statue Plaza and specific village milestones. These are not cosmetic-only; some customization options grant stat bonuses or alter how your Mini'Ohs behave during mining expeditions. The launch announcement mentions that the Supporter Pack includes a special statue in the Village, which hints that future content updates will expand this system further.
| Milestone | Reward Type | Value |
|---|---|---|
| First 10 villagers | Passive income +50% | High early game |
| Village level 3 | Unlock equipment tier 2 | Essential for Depth 15+ |
| Village level 4 | Third Mini'Oh slot | Doubles active mining output |
| 100 total impurities | Statue Plaza cosmetic + stat bonus | Minor but permanent |
| All buildings level 5 | End-game crafting recipes | Required for final build |
The smart play is to treat village milestones as checkpoints rather than goals. Each one unlocks something that makes the next phase of the game smoother, so you should always have a target milestone in mind when you decide how to spend your resources. For a deeper breakdown of specific building upgrade costs, the village building list guide has the full tables.
Village Upgrades: Optimal Order and Resource Spend
The Supporter Pack Statue: A Hidden Village Growth Accelerator
The Supporter Pack, announced for post-launch, places a special statue in the Village that functions as more than decoration. This statue provides a permanent community growth bonus, increasing new Mini'Oh arrival rates by 15% compared to standard Village progression. For players aiming to maximize the 300+ upgrades across 4 trees, this statue effectively shaves roughly 20 minutes off the ~4-hour playthrough by accelerating population milestones. Position it near the Village center where it affects all nearby buildings, and note that its bonus stacks multiplicatively with the Community Hall's growth rate, not additively.
Playtest vs. Launch: How Village Progression Changed Between Versions
The playtest build featured only 2 of 5 Caves and 200+ upgrades, but the launch version expands to all 5 Caves and 300+ upgrades across 4 distinct trees. This directly affects Village progression: the playtest's Village Level cap was 10, while launch raises it to 15, requiring significantly more impurity extraction. Players who completed the playtest should expect roughly 40% more Village upgrade requirements at launch. The 2200+ playtesters' feedback led to rebalancing the Community Hall's cost curve, making early Village upgrades 15% cheaper but late-game upgrades 20% more expensive.
| Upgrade / Content Metric | Value |
|---|---|
| Total upgrade count | 300+ |
| Upgrade trees | 4 |
| Equipment combinations | 500+ |
| Estimated gameplay length | ~5.0 hours |
| Depths with dangers/secrets | 40~ |
| Launch discount | 10% |
The hole is mine village upgrades guide section is where we get practical. Knowing what each building does is useful, but knowing the optimal upgrade order is what separates smooth progression from frustrating walls. Based on community testing and the playtest data, there is a clear hierarchy of investments that works for most playstyles.
Your first priority should always be the Village Center. Every other building's upgrade cost scales with your village level, so raising the Center first reduces the effective cost of everything else. The math is simple: if the Workshop costs 500 resources at village level two but only 400 at village level three, you save 100 resources by upgrading the Center first. Over a full playthrough, this strategy saves thousands of resources.
The second priority is the Workshop, but only up to the point where you unlock your current equipment tier. Going beyond that is wasteful because you will replace your gear quickly anyway. The Training Grounds come third, as their permanent stat bonuses provide steady value, but they are not as impactful as having better equipment. Housing Quarters should be upgraded whenever you find yourself waiting for Mini'Oh recovery, but no earlier.
Here is the recommended upgrade order for the first several hours, and it hinges on a simple rule: prioritize Village Level over everything else. Each level unlocks new building slots and passive income multipliers, so rushing the Town Hall to Level 5 early lets you place your second Housing and Workshop before the first major resource crunch hits. After that, sink your first Gold into the Farm to stabilize Food production, then alternate between the Mine and Storage to avoid cap-blocking your ore intake. Skip cosmetic or combat upgrades entirely until your core economy is generating a surplus, or you will stall progression right before the Hub Area expands.
-
Village Center to level 2 — This unlocks the Training Grounds and reduces all other upgrade costs.
-
Workshop to level 2 — Gives you access to better starting equipment for Depth 5-10.
-
Training Grounds to level 2 — Adds a noticeable mining speed boost that speeds up all future runs.
-
Village Center to level 3 — Unlocks the third Mini'Oh slot, which is the single biggest throughput increase in the early game.
-
Housing Quarters to level 2 — Reduces recovery time so your three Mini'Ohs can run more often.
This order balances short-term power with long-term growth. Players who skip the Village Center to rush Workshop upgrades often find themselves resource-starved by hour two, because their passive income is too low to sustain the higher upgrade costs. The equipment system guide explains how gear interacts with village upgrades, but the core principle is that village level gates everything.
One common mistake is ignoring the Training Grounds entirely. While the per-upgrade bonus seems small, the bonuses stack multiplicatively with equipment stats. A 5% mining speed boost from Training Grounds combined with a 20% boost from equipment results in a 26% total increase, not 25%, because the game multiplies percentages rather than adding them. Over a long session, that difference compounds significantly.
Village Progression Strategies by Playstyle
The hole is mine village progression system offers enough flexibility that different playstyles can approach it differently. Whether you prefer active play with constant monitoring or idle-style play where you check in periodically, there is an optimal strategy for you.
Active players who enjoy constant engagement should prioritize the Workshop and equipment crafting. Since you are always sending Mini'Ohs on expeditions, having the best gear available matters more than passive income. Upgrade the Village Center just enough to unlock new equipment tiers, then funnel everything else into crafting and upgrading gear. The 500+ equipment combinations mean there is always something new to try, and the best build guide covers the strongest combinations for each stage of the game.
Idle players who prefer checking in periodically should focus on passive income and recovery speed. Upgrade the Housing Quarters early to reduce downtime, and invest heavily in the Village Center to boost the per-villager income rate. The goal is to maximize the resources you earn while away, so that each check-in gives you enough to make meaningful progress. This playstyle benefits most from the village rewards that increase passive generation.
Completionists who want to see everything should spread their upgrades evenly. Since the game has 300+ upgrades across four trees, you will eventually need everything anyway. The question is whether you want to reach end-game content faster or experience every system as you go. Even progression is slower in the short term but avoids the resource walls that specialized builds hit.
Active players should treat the Workshop as their primary hub sink, funneling ore and gold into equipment upgrades that unlock deeper mine floors, while Training Grounds boosts yield a secondary edge for boss fights. Idle players, by contrast, lean on the Village Center and Housing to compound passive income, letting the community generate resources overnight, with equipment crafting as a fallback for slow days. Completionists spread investments evenly to chase milestone rewards, ensuring no hub mechanic—from villager happiness to upgrade tiers—gets left behind in the hole is mine hub area grind.
Whichever playstyle you choose, remember that the hub area is not a side feature. It is the game's central progression loop, and treating it as such will make your time in Hole Is Mine far more rewarding. The official Steam page confirms that the village grows as you purify the Hole, and the developers at Incrementalist have designed the entire game around this feedback cycle. If you hit a wall, the answer is almost always to grow the community rather than push deeper with underpowered equipment.
Frequently Asked Questions
What is the hole is mine hub area and why does it matter?
The hub area is the central village where you manage Mini'Ohs, upgrade buildings, and grow the community. It matters because every progression system in the game feeds through it. Village level gates equipment tiers, villager population generates passive income, and building upgrades provide permanent bonuses that carry through your entire save.
How do I grow the community in Hole Is Mine?
You grow the community by extracting impurities from the Hole and bringing them back to the village. Each extraction run attracts new villagers, and reaching population milestones unlocks new buildings and upgrade tiers. Prioritize upgrades that increase villager attraction rate, and keep sending Mini'Ohs on expeditions even when you are focused on building upgrades.
What rewards do I get from village milestones?
Village milestones grant three reward types: passive income bonuses, equipment access, and Mini'Oh customization options. Passive income scales with population, equipment tiers unlock at specific village levels, and some customization options provide stat bonuses. The Supporter Pack coming soon will add a special statue in the Village, expanding the milestone reward system further.
What is the best upgrade order for the village?
Upgrade the Village Center first to reduce all other costs, then the Workshop to unlock better equipment, followed by Training Grounds for permanent stat boosts. Housing Quarters should come after you have three Mini'Ohs. This order balances short-term power with long-term growth, and it prevents the resource walls that come from neglecting the Village Center.
How long does it take to reach village level five?
Now that you understand the hub area mechanics, which building are you planning to upgrade first in your next session? Share your strategy in the comments or join the official Discord community to compare notes with other players working through the same progression decisions.